
- Full project photo album is HERE
The top half of our basement stairwell seemed darker than usual with the trips to the freshly remodeled (and brighter) basement. The only light was at the bottom of the stairs on a 3-way switch; the top felt unsafe since it was noticeably darker. So…. how hard could it be to add a light? As it turns out, a LOT!
Wrong Way: Disrespecting the 3-Way
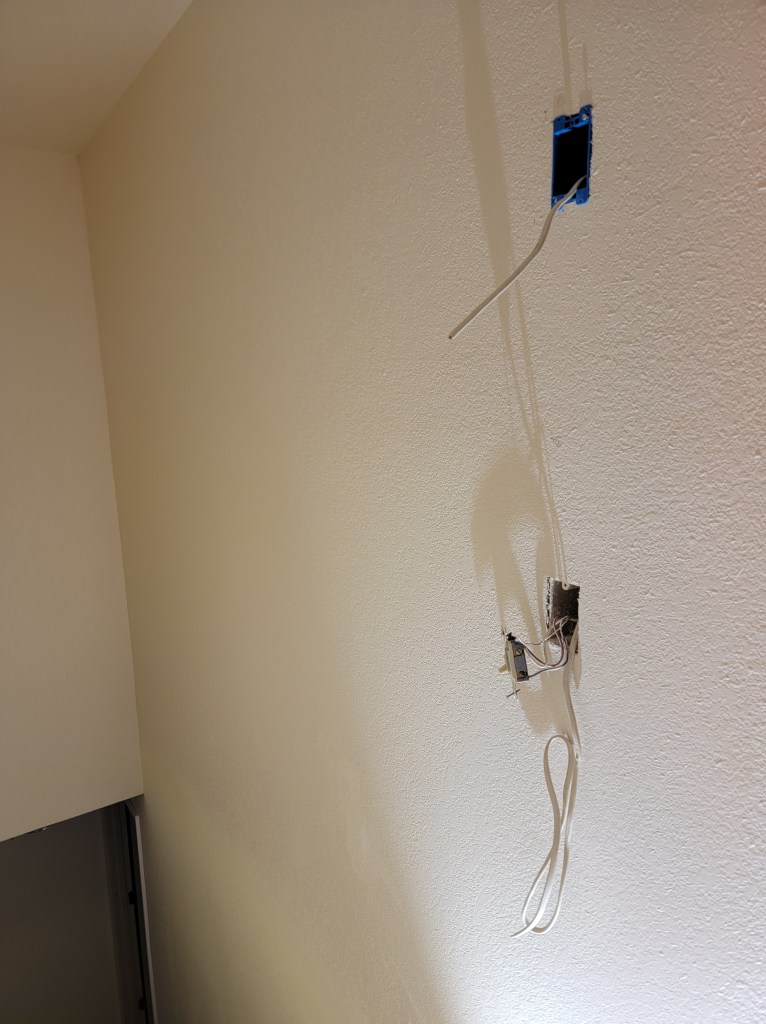
I opted to go with a new wall sconce positioned above the top wall switch. I (very) incorrectly assumed I could simply wire into that switch, but a 3-way circuit is a lot more complicated (especially when you’re not sure how it was originally wired).
I bought an “old work” electrical box, switched off the breaker, located the studs with my finder, traced the box, and cut the necessary hole with my Dremel. I ran a 2-conductor+ground wire through the hole and wired it into the switch, then finished it off by securing the electrical box and connecting the new sconce.
I switched on the breaker and realized I made bad assumptions! The switch would turn on one light, but not the other (or leave one light on while the other toggled). Ugh. Then it hit me: the new sconce needed to be wired in parallel with the one at the bottom of the stairs.
Right Way: The wall sconce at the top of the stairs was a good idea. So was the “old work” electrical box. Everything else was a do-over. I’d have to run a wire from the new sconce to the existing ceiling light and wire them in parallel.
Challenges: Running the wire vertically from the sconce electrical box into the unfinished basement would mean locating the drop point in the basement and drilling a hole up through a horizontal wall stud, the subfloor, another stud, and anything else in the way. Running the wire from the unfinished basement to the existing ceiling light would mean locating the best spot in the unfinished basement and drilling a horizontal hole through an exposed double-thick joist and a hidden regular joist about a foot behind it (closer to the light). Both paths could be fraught with unforeseen obstacles…
Shopping
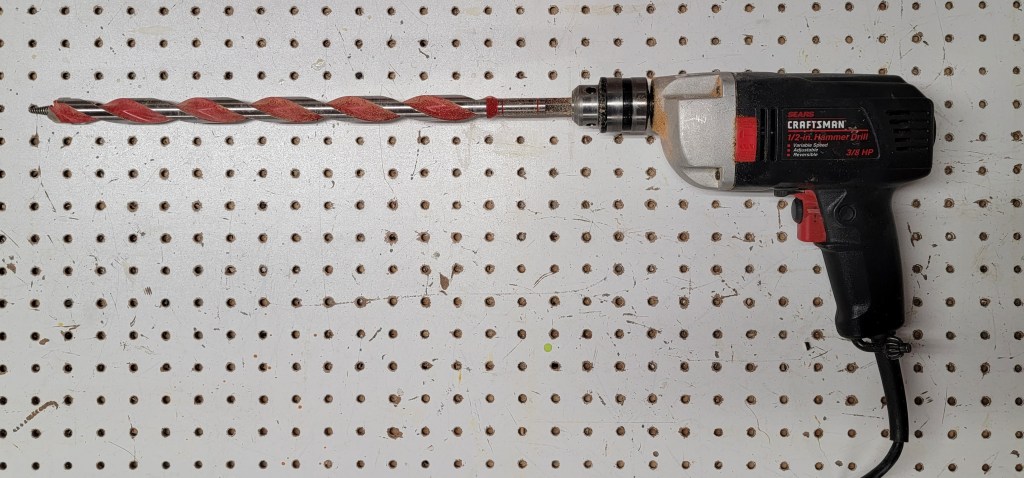
I purchased a 7/8″ 17 1/2″ auger bit for my old 1/2″ Craftsman heavy drill.

Unfinished Basement to Upper Wall Sconce
I started by drilling a vertical hole from the unfinished basement into the ceiling below the sconce. I drilled most of the way but I hit something and the drill wouldn’t go further. I purchased a Borescope (camera + LED light at the tip of a long bendable wire connected to a hand-held screen) to see what the problem was: a nail! The bit wouldn’t cut it, so I shifted over a few inches to the left and started over. This time, success! Feeling the drill break through the last board was a great feeling, especially since I only had an inch of bit left to spare. I took a look with the Borescope, and this time it looked like a clean run to the sconce!

I marked the wire at 9′ (should be long enough) and ran it upwards into the ceiling hole. It didn’t seem blocked the whole way up (yay!), so I taped the wire to the adjacent stud (to keep it in place), climbed the stairs, and took the electrical box out of the wall to search for the wire. Lucky day! It was right there! I pulled it through and re-installed the electrical box.
Unfinished Basement to the Lower Ceiling Light
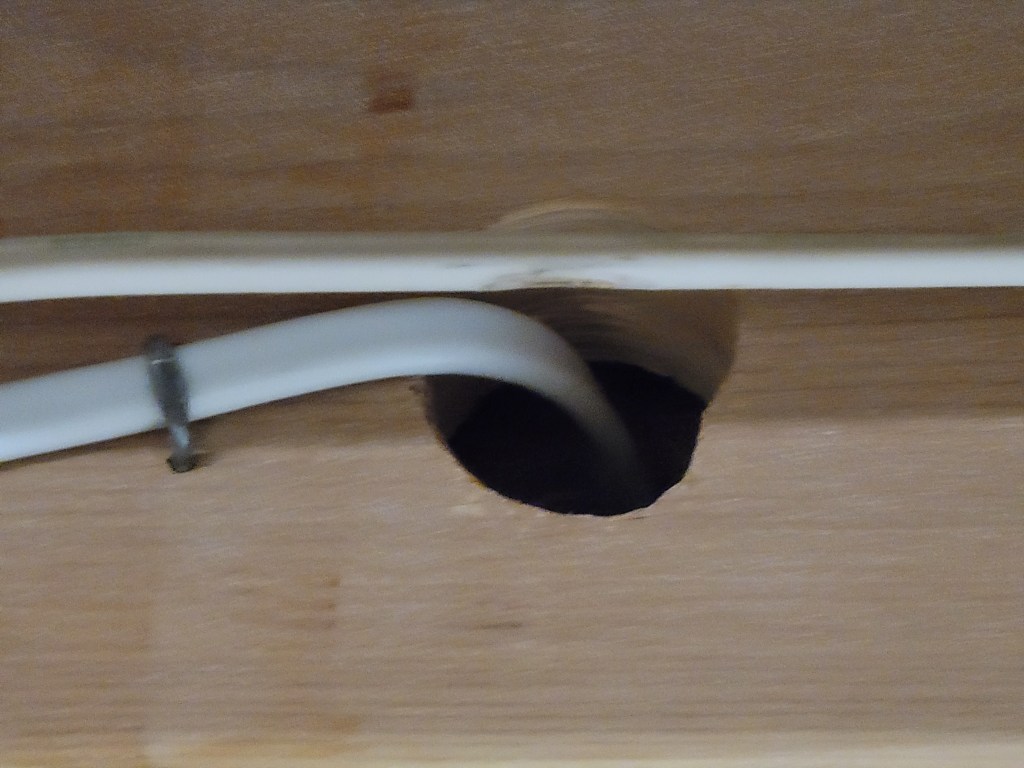
For the lower horizontal hole I drilled through the first set of double-joists (shown here after wiring), but my 17 1/2″ bit was still too short to reach the second joist. No worries, I had a plan. 🙂

I removed the lower, existing ceiling light and used my hole-saw to cut away a 4″ round section of ceiling drywall adjacent to the junction box. I made sure it fit within the clearly visible light perimeter so it would be hidden once the light was re-installed.
I easily drilled into the second joist using my existing drill configuration.

I inserted the wire from the unfinished side and kept poking at the hidden 2nd joist ’til the wire ran through the hole (I used the borescope to help). Once through I routed the wire into the top of the ceiling junction box and pulled through the slack.
I didn’t want to leave that access hole in the ceiling, so I secured a cross-piece of scrap wood with drywall screws. Then I did the same with the round drywall plug that was still in my hole-cutter. That’s good enough for now; I’ll mud / texture / prime / paint if we get a smaller light (not likely!).
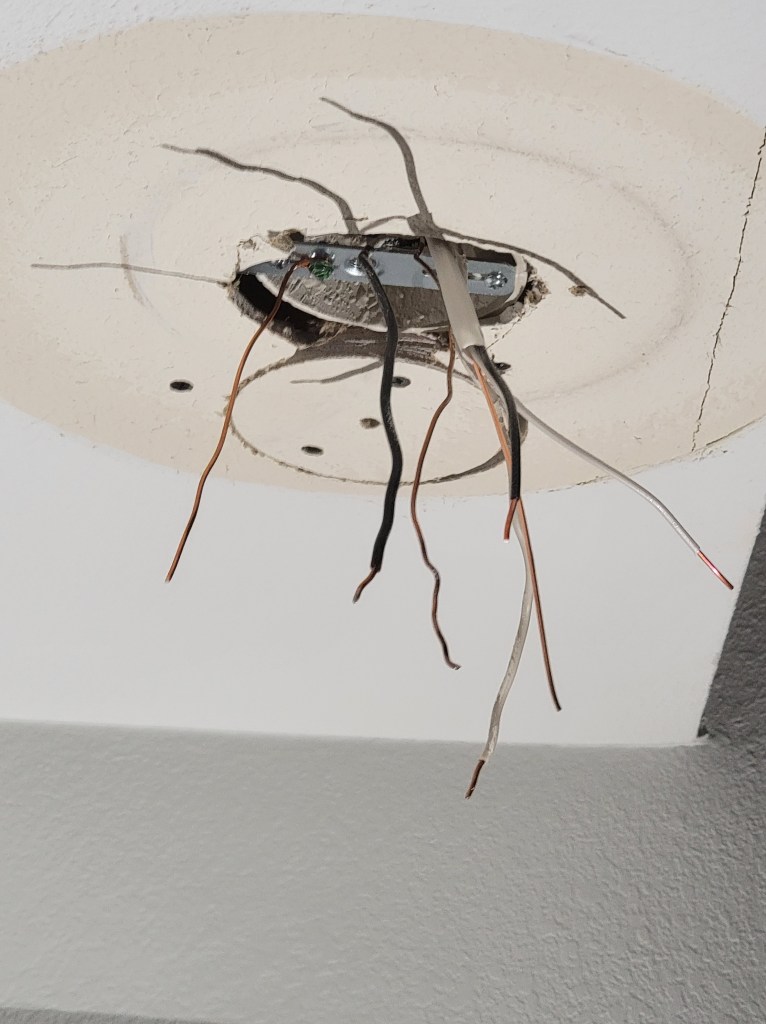
I prepped the wires and made sure everything was properly grounded.

Wiring the Lights
This part was easy; I’ve done it a hundred times. I wired the lights and switched on the breaker. Success!
After a LOT of cleanup (wiring, sawdust, wire bits) I could sit back and feel good about my bull-headed persistence!
