
- Full project photo album is HERE
The new powder room vanity will include two sliding drawers. Details on their construction are below. The steps are in construction order, though the recordings may have been created out of order 😉
I used Poplar S4S (Home Depot) rather than Walnut to save in cost. I purchased the Poplar at dimension, saving me from using the Jointer and Planer (since the boards were already at the proper thickness).
You’ll need to add the length of the dovetail tail to the drawer side lengths (in this case 3/8″) since they’ll extend and disappear into the drawer fronts (pins).
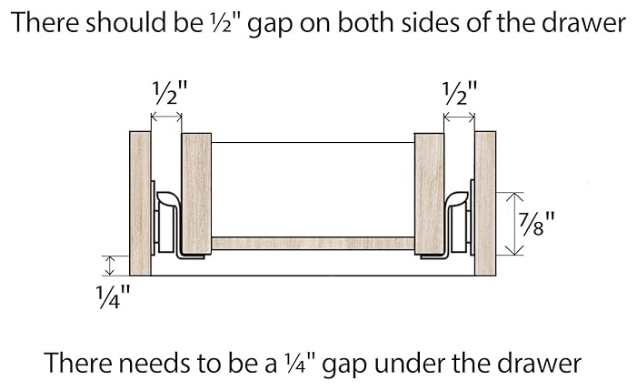
Slider Spacing
I also chose my drawer slides BEFORE I settled on the drawer dimensions. My hardware requires 1/2″ spacing on both sides of the drawer, and 1/4″ from the bottom.
Selecting Drawer Height
Dovetails should be evenly spaced across the drawer height. My Porter-Cable 12″ Combination DoveTail Jig (4216) specifies 1″ increments for half-blind dovetails, so I set the drawer height to 6″.
Laying Out: Taping and Groove Depth
I assigned each corner a unique number / letter, and I labeled both boards forming that corner with the same number / letter assignment. That way I was sure to select the proper two boards when I dovetailed them for any particular corner.
I also determined the bottom drawer panel position to make sure the groove wouldn’t be visible after the dovetails were assembled.
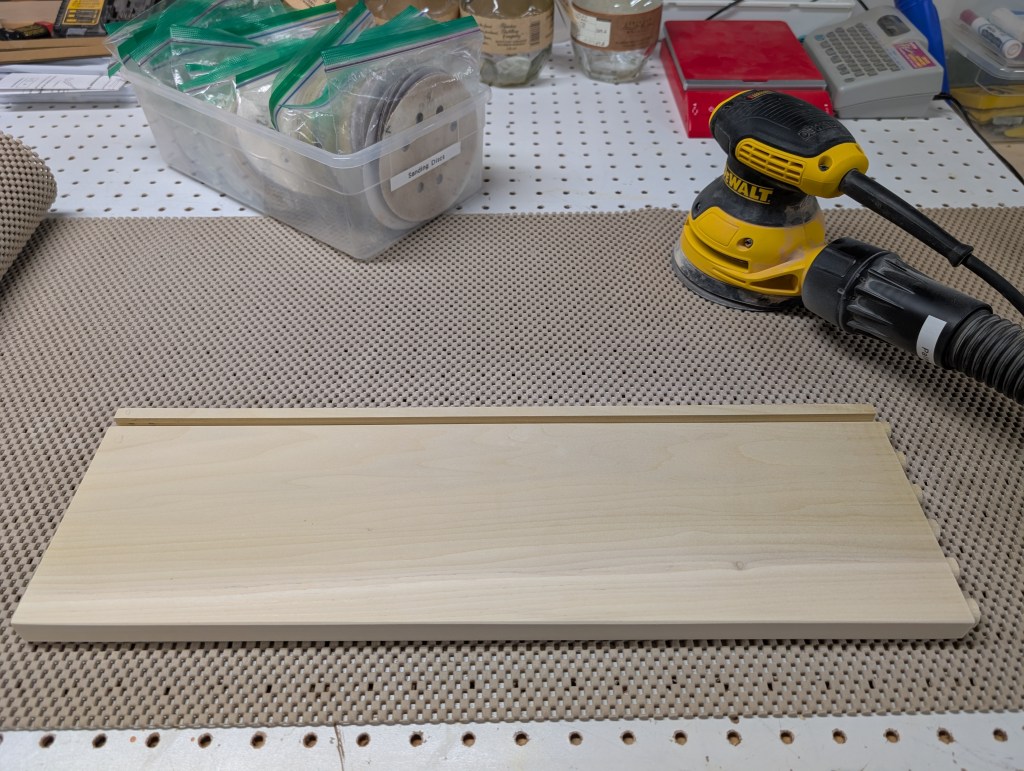
Sanding
I use a clamped-down friction pad (also sold as shelf liner) to keep the board from sliding when I sanded. I also connected my DeWalt DWE6421K 5-Inch Random Orbit Sander to the Vac to minimize dust.
I made two passes: One at 220 and a finishing pass at 400. I also did an edge rollover on the top of the drawer to soften them.
Cutting the Dovetails
The video explains the dovetail process. It’s easy enough once you get everything set up, so take your time and get that right. The manual provides adjustment tips if the pins and tails don’t properly match.
Bottom Groove: Cut 1
The 1/4″ finished Maple drawer bottom will float in a grove that encircles the inside. The grove should be a wee bit wider than the drawer bottom to guarantee the float.
Also be sure to set the grove within the dovetail pin so it won’t be visible when assembled (per above).
Bottom Groove: Cut 2
Three slots need to be cut on the table saw since the blade is narrower than the grove width. Here the 2nd cut’s position is set, along with guidance on how to set the blade depth.
Bottom Groove: Cut 2 Complete
The middle cut’s table saw position is less critical. Check the overall groove width before moving on.
Fit Test
The drawer is put together (no glue) to make sure everything looks good.
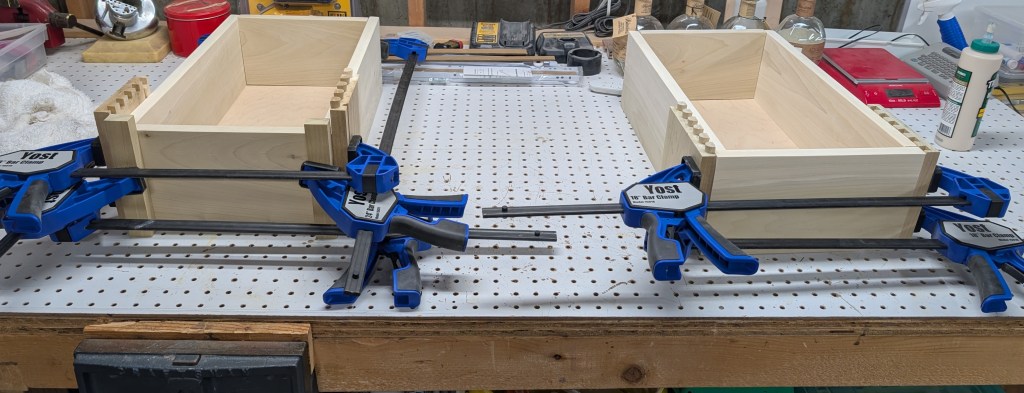
Gluing and Clamping
I glued and clamped both sides of the drawer fronts first (using scraps under the clamps). I still fully assembled the drawers, however (with the back corners not yet glued) and used a carpenter’s square to ensure proper drawer alignment.
Once the front set I glued the drawer backs. As before, I used a carpenter’s square to ensure placement and vertical alignment before I fully tightened the clamps.
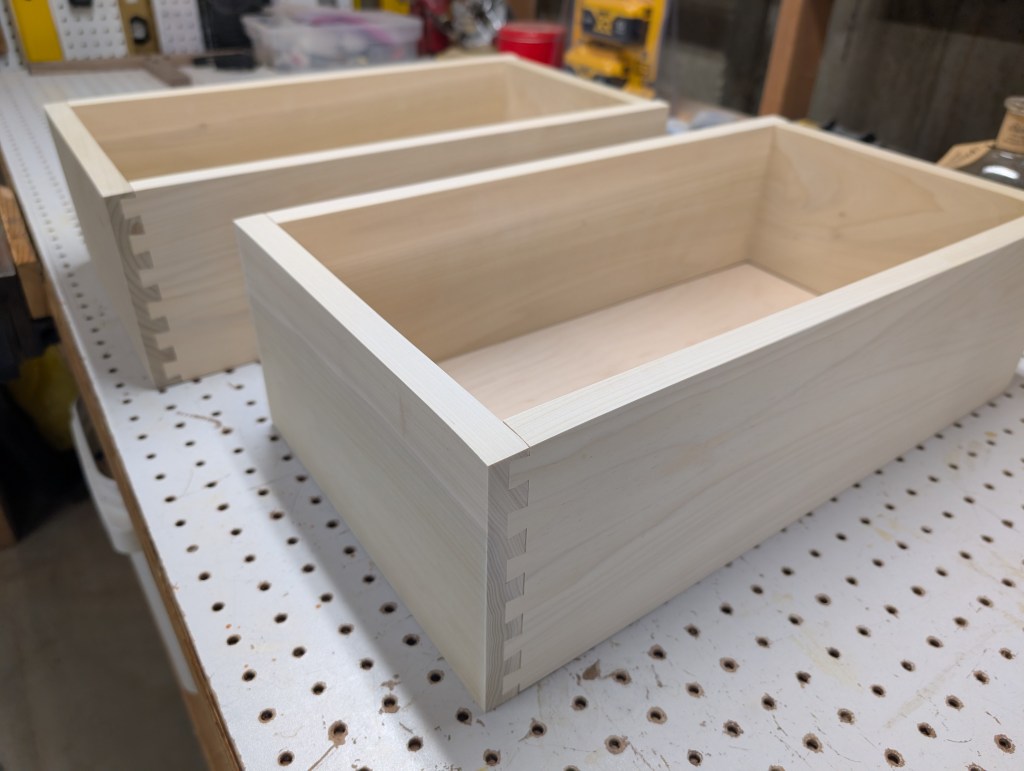
Assembly Complete
Ta da! I’m pretty happy with them. I did another sanding pass over the dovetails, and along the top joints to smooth things a bit.
I’ll apply the same finish coating as I do with the Walnut. More on that later.
