
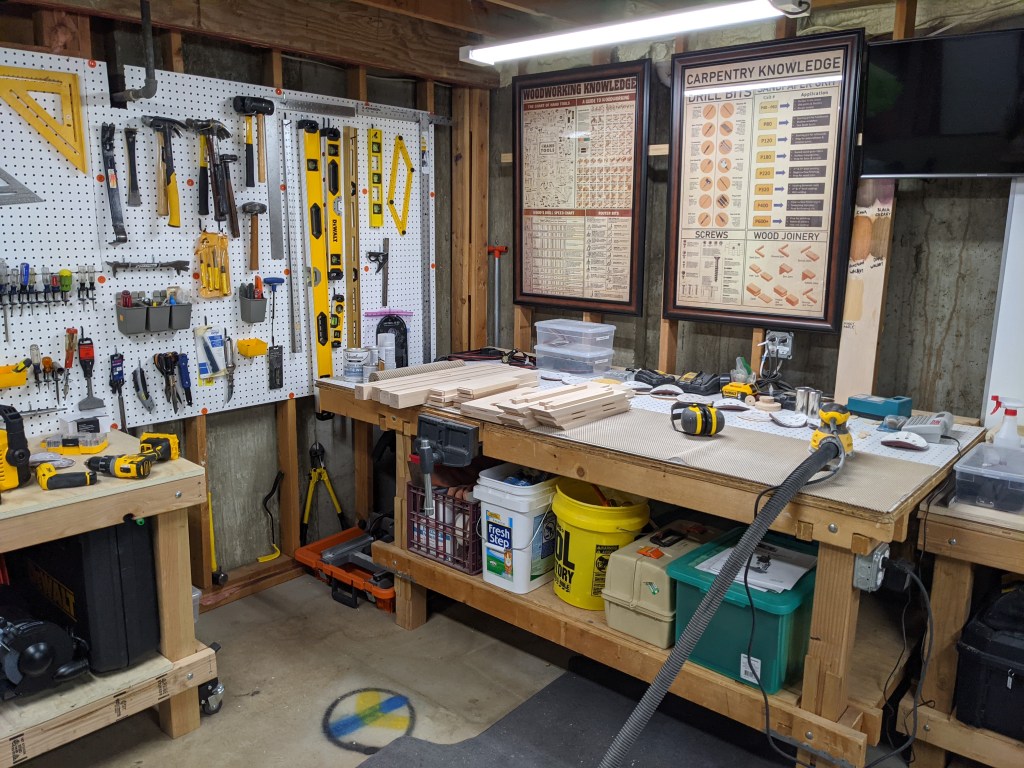
I have a number of workbenches in my workshop: large, mobile, tool-specific, …. And even so, it always seems I need more space.
I have three basic tables:
- My large, stationary table that I built years ago. It’s just shy of 4′ x 8′ and includes a ton of storage on the lower shelf. Included: vise*, grid top,* and a backstop*.
- A smaller mobile table that I can get to from all sides. Included: holes for doglegs*, another vise*, and a shelf for storage.
- A long cross-cut table with drop-ins for my router table and miter saw. These benches support cross-cutting / routing longer boards and extend beyond the reach of these tools. It includes a lower shelf and metal brackets for 90-degree angle setting*.
- (well, not really a table): Saw Horses, Folding Tables, and my table-saw extension.
The benches are heavy, fit the space, and include an under-shelf area for storage. Legs are 4x4s bolted to the frames with carriage bolts (drill press for accuracy). Frames are 2×4 boxes with vertical 2x4s holding it all together (wood screws). Surfaces are generally pre-sanded plywood (notched around the legs for the lower shelf). So far, so good. Not too difficult.
The drop-ins for the router table and miter saw are more interesting. The surface of the tool needs to be as level as possible to the workbench surface. I accomplished this by building “tool tables” for each and adjusting:
- Build independent tool tables within the workbench that can float on vertical 2x4s for easy height adjustment.
- Vertically position the tool tables based on rough measurements.
- Clamp the tool tables in place.
- Add temporary 2x4s under the tool tables to support the weight of the tool.
- Place the tool on the tool table.
- Note the needed adjustments.
- Remove the tool, unclamp, adjust the height, and shim / trim the temporary 2x4s to the adjusted height.
- Repeat steps 3-7 until the workbench / tool surfaces meet.
- Use wood screws to secure the tool-table to the workbench verticals.
I also made a hinged extension table for my table-saw. It often serves as another general worktop space.
*I’ll talk about “special features” in a future blog posting (surfaces, vises, rails, etc.).
Large Workbench
The larger bench in the corner is nearly 4′ x 8′. It includes a grid surface, large storage shelf, electrical outlets, and stop in the back.
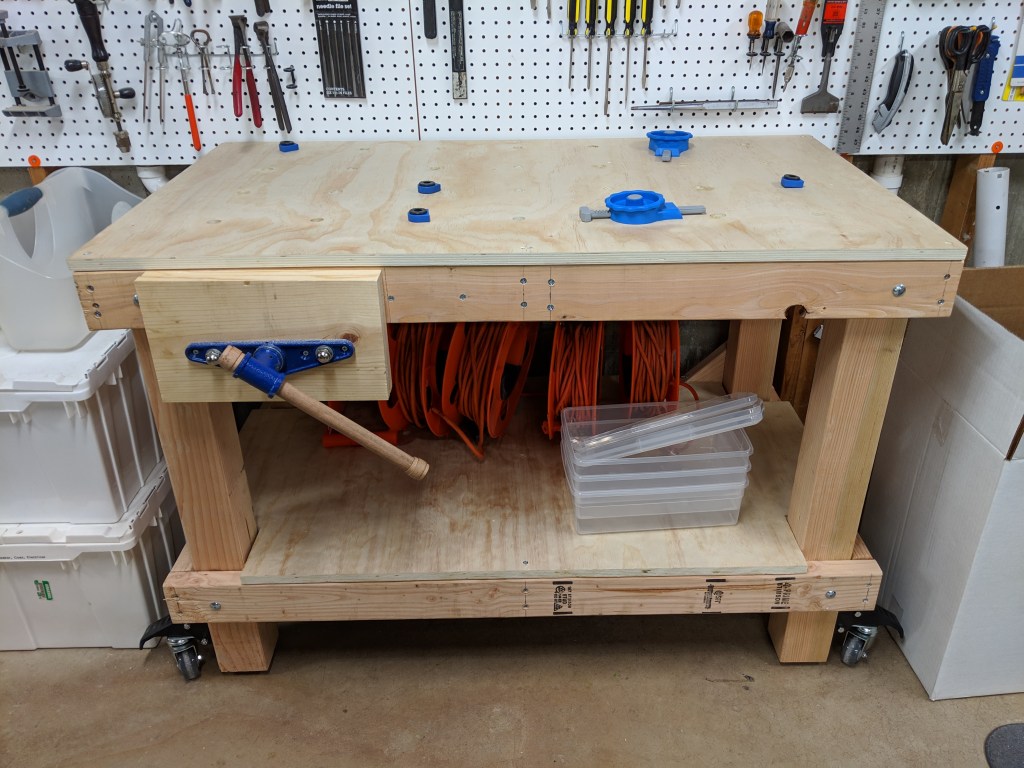
Small Portable Table
Includes casters for mobility, a wood vise, storage shelf, and a grid of holes for dog-legs / clamps.
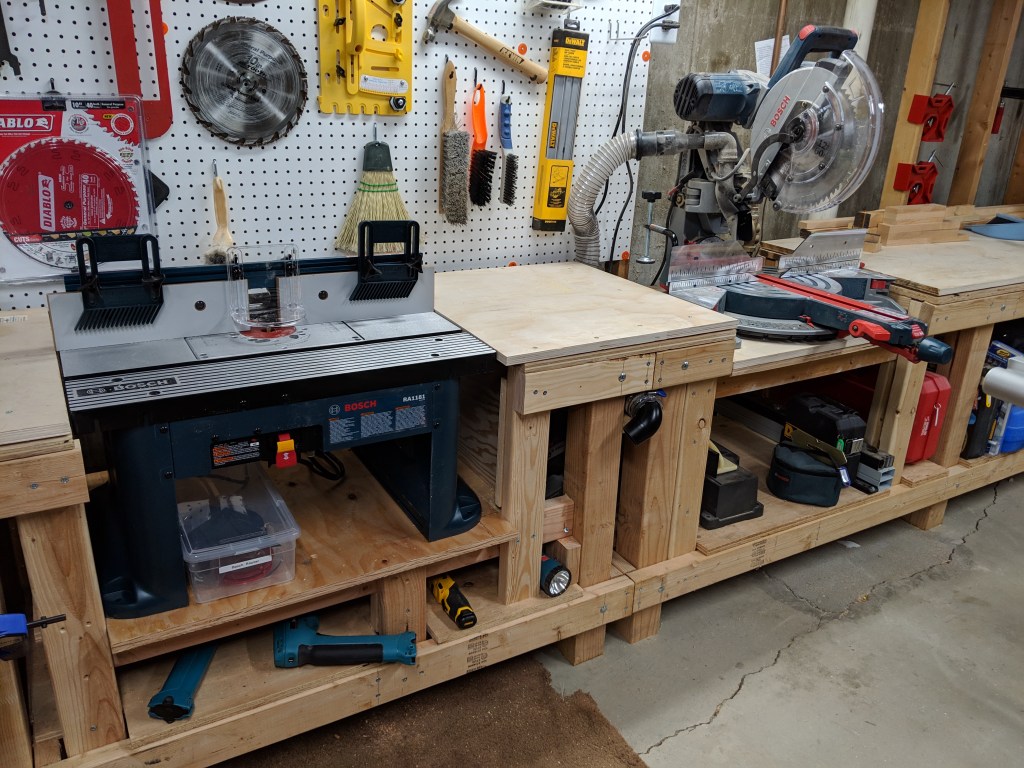
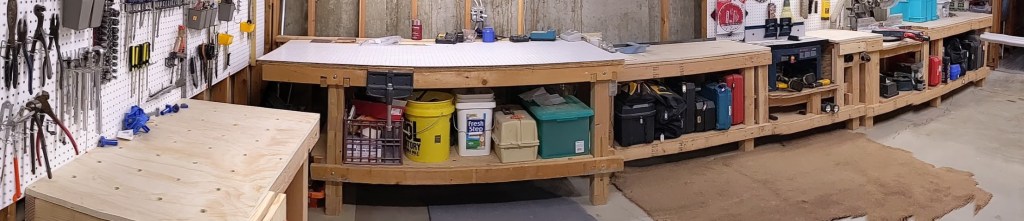
Cross-Cut Table
This long table includes drop-ins for my router table and miter saw. The drop-ins are attached to the vertical 2x4s on either side. This table extends to either side of the photo to accommodate longer boards.
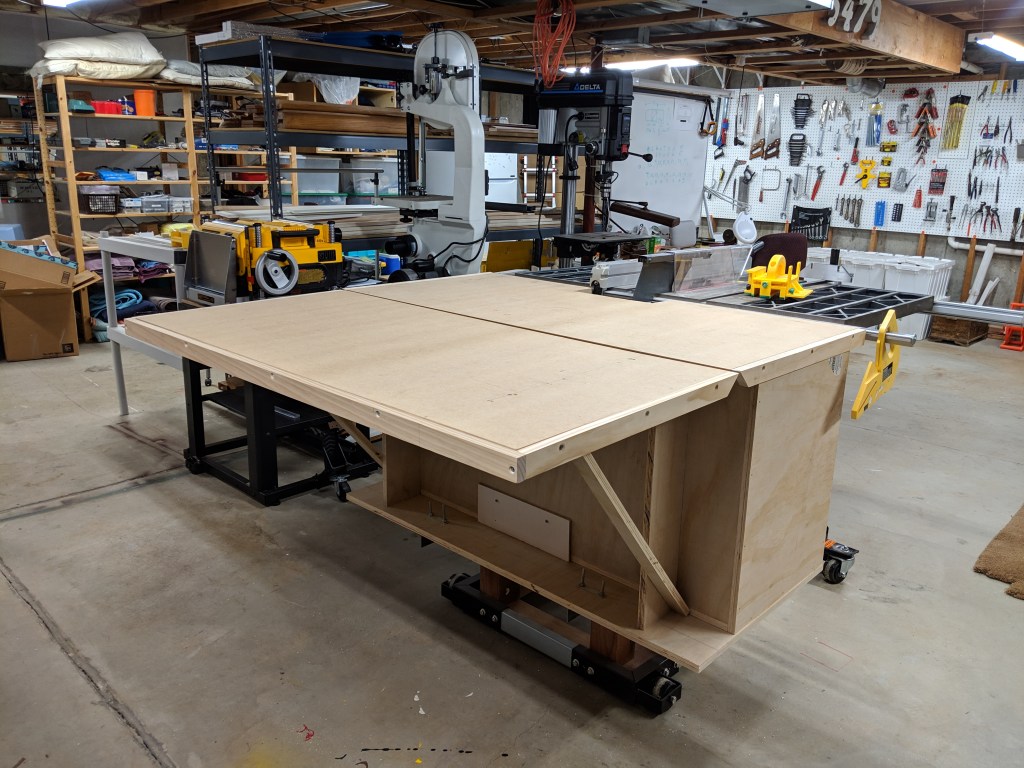
Table Saw Extension
The extension table for my table-saw includes a hinged extension, providing a large surface when needed. And yes, the entire tool is mobile.

Could you organize my basement in the same manner as yours please!
LikeLike
how much square footage is your workshop?
LikeLike
The actual shop where I do the work (not including wood storage space) is 26.5′ x 14.5’… I use some adjacent general storage area for wood storage.
LikeLike
The workshop is really amazing and a shop project in its own right. As a model maker in my younger days, I learned to appreciate how important a good shop can be. Also very important to successful project completion is jigs and fixtures. I can’t tell you how many times, I tried fumbling, putting together multiples of things, realizing it would have been so much easier if I wasn’t being lazy and built a jig and fixture. 😉
LikeLike