
Big news, the shelves are DONE! The molding is in place and it all looks great. Yes, they look like built-ins, so mission accomplished. 🙂
[For now] I’m hiding the shelf contents, so forgive the grayed polygons. They don’t take away from the work itself, however.
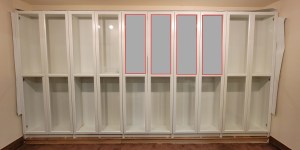
The five IKEA shelves sitting on the platform. You can see the plastic sheeting peeking out at top and on the sides (to protect from future water damage, if any).
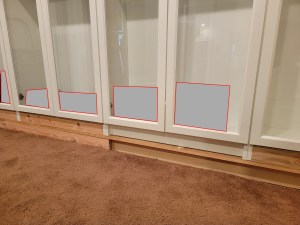
I used 2x4s to fill the gaps at the bottom (between the shelves AND below them at floor level). But I had to use a planer (a DeWALT DW735) to achieve the proper thickness. The goal was to be flush with the bottom of the IKEA shelving.

For the top, I cut a series of 4x4s and laid them on the top. I ran scrap 2x4s across the rears to weight them down.
I used painters tape on the front of the cabinets to mark the 4×4 locations. Then I screwed the support board (next picture) into the ends of the 4x4s.

The top and lower support panels are screwed into place! They are raw boards flush with the shelf cabinets.
For the sides (not pictured), I cut vertical fillers at an angle since the walls are uneven. That was tricky; I drew a tapered line to match the wall contour and I free-cut it on the table saw (no guards), and glued it to the sides of the shelving using shims against the wall to hold them in place (with a couple of nail gun hits through the cabinet for insurance).
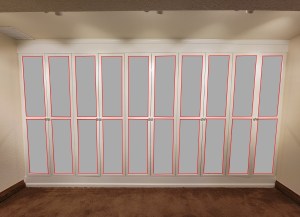
Finished! The molding was pre-primed. I matched the color of an IKEA shelf at the paint store and gave all of the molding (flat panels, upper / lower moldings, and side pieces) two coats before installation.
The molding wasn’t long enough, so I used bevel-cut scarf joints to bring two pieces together in a somewhat hidden way.
Finished off with caulking along the ceiling and walls.

Looks great Kevin!
LikeLike